


Choosing the right size for your event displays is key to making an impact. Whether you’re planning for a trade show, outdoor festival, or corporate event, here’s how to decide:
- Flags: Match flag size to viewing distance and pole height. For example, a 3×5 ft flag works well for outdoor events, while larger sizes like 10×15 ft are ideal for big gatherings.
- Banners: Use the 1-inch-per-10-feet rule for text size. Small banners (2×4 ft) suit close-up displays, while large ones (5×10 ft) grab attention from afar.
- Tents: Plan for 10–20 square feet per person, depending on seating style. A 10×10 ft tent fits small booths, while a 20×40 ft tent works for larger gatherings.
Quick Tip: Combine flags, banners, and tents with consistent branding for a professional look. Use weather-resistant materials for outdoor events, and always measure your venue to ensure everything fits.
Now, let’s dive into the details!
Craft Fair Q&A – Ep. 4 – Booth Sizes & Placement at an Event
Understanding Visibility and Proportion for Event Displays
Designing the perfect event display means knowing how your audience will see and interact with it. The balance between viewing distance, venue size, and design elements is crucial to ensuring your display stands out rather than blending into the background. Let’s explore how viewing distance plays a role in determining the ideal display size.
How Viewing Distance Determines Display Size
The distance between your display and your audience is one of the most important factors in choosing the right size. The farther away your viewers are, the larger your display needs to be to make an impact.
Here’s a simple rule of thumb: for every inch of letter height, your text will be readable from about 10 feet away. So, if you want your message to be visible from 80 feet, your letters should be at least 8 inches tall. This principle applies to all types of event displays, ensuring your message stays clear and noticeable even at greater distances.
Display sizes should match the viewing distance. For instance:
- Small banners (2′ x 4′) are ideal for table-level displays.
- Larger banners (5′ x 10′) are better suited for outdoor spaces where you need to grab attention from farther away.
For feather flags, the text size matters even more. Main words with 4–5 letters should have text heights of 35–45 inches to stay readable from up to 450 feet.
| Letter Height | Maximum Distance | Best Use Case |
|---|---|---|
| 1" | 40 feet | Table displays, close-up viewing |
| 2" | 75 feet | Booth backdrops, indoor events |
| 4" | 150 feet | Outdoor festivals, parking lot signs |
| 8" | 350 feet | Large outdoor events, highway visibility |
| 12" | 525 feet | Stadium displays, major outdoor advertising |
While viewing distance is a critical factor, the physical space of your venue also plays a big role in determining display dimensions.
Matching Display Size with Venue Space
Your venue’s size and layout can either limit or expand your display options. Before finalizing your design, check for any restrictions. Indoor venues might have height limits, while outdoor spaces may require additional room for setup.
How your audience moves through the venue is equally important. For example:
- At trade shows with narrow aisles, tall vertical banners can maximize visibility.
- Outdoor festivals with open spaces allow for wider, larger displays.
The layout and crowd density of the venue will guide your choice of display size, ensuring your message reaches its intended audience effectively.
Text Size and Logo Placement for Clear Branding
If you want your branding to stand out, pay close attention to text size, font choice, and logo placement. The font size should fit the banner’s dimensions and the average viewing distance.
High-contrast text, such as white on dark backgrounds or vice versa, makes your message easier to read from a distance. Keep your wording concise – 7 to 10 words is a good limit for readability.
Focus on the essentials. Your company name, headline, or call to action should dominate the design, while secondary details can be smaller. A good rule is to use about 40% of the space for text and leave the rest as white space to enhance clarity.
For logos, placement is everything. Positioning your logo near the top of banners or flags ensures it grabs attention right away. Additionally, key messages should be at least 3 to 4 feet above the ground to avoid being blocked by common obstacles.
Finally, stick with bold, non-serif fonts – they’re easier to read at a glance, especially from a distance.
Choosing the Right Flag Size for Your Event
When planning an event, selecting the right flag size is key to making a strong visual impact. The flag should fit your venue, align with your audience’s perspective, and complement your display setup.
Standard Flag Size Options
Flags come in a variety of sizes, from smaller 2×3 ft options to massive 30×60 ft displays. The 3×5 ft flag is a favorite for outdoor events, business displays, and even residential use. If you’re hosting a larger gathering, sizes like 4×6 ft or 10×15 ft can draw more attention and create a bigger impression.
For truly large-scale settings – think airports, stadiums, or military bases – flags measuring 30×60 ft or more are often used. While these giant flags are undeniably striking, they require specialized equipment and plenty of space, making them less practical for most events.
Here’s a quick guide to common flag sizes and their best uses:
- 2×3 ft: Ideal for indoor displays, small booths, or table presentations.
- 3×5 ft: Perfect for outdoor events, business displays, or residential use.
- 4×6 ft: Great for large outdoor events, public displays, or commercial buildings.
- 5×8 ft: Suited for major events, institutional displays, or high-visibility locations.
- 6×10 ft and larger: Best for stadiums, large-scale advertising, or corporate headquarters.
Before choosing a size, measure the display area and consider how far away your audience will view the flag. Proper proportions between the flag and its pole are also essential for a balanced, professional look.
Flagpole Height and Flag Size Ratios
The height of your flagpole and the size of your flag go hand in hand. To achieve a balanced display, the flag’s length should be about one-quarter to one-third the height of the pole.
"Selecting the perfect flag size is crucial for achieving a visually impressive display that honors the symbol it represents." – Allegiance Flag Supply
This proportion ensures the flag doesn’t look too small to notice or so large that it overpowers the display. For wall-mounted poles, the flag’s width should be half the length of the pole for proper balance.
Here’s a handy reference table for matching flag sizes to pole heights:
| Flagpole Height | Minimum Flag Size | Maximum Flag Size |
|---|---|---|
| 15 ft | 2×3 ft | 2.5×4 ft |
| 20 ft | 3×5 ft | 4×6 ft |
| 25 ft | 4×6 ft | 5×8 ft |
| 30 ft | 5×8 ft | 5×8 ft |
| 40 ft | 6×10 ft | 8×12 ft |
| 50 ft | 8×12 ft | 10×15 ft |
Taller poles are excellent for commercial or institutional settings where visibility from a distance is essential. For smaller venues or intimate events, shorter poles with appropriately sized flags provide a more balanced appearance. To maintain visual appeal, keep the flag’s width to no more than one-fifth of the pole’s height. This allows the flag to move naturally in the wind while maintaining its aesthetic charm.
Portable vs. Stationary Flag Options
When deciding between portable and stationary flag setups, consider your event’s needs, including duration, location, and flexibility.
Portable flag stands are the go-to choice for events that require mobility or quick setups. These stands are designed for easy transport and assembly, making them perfect for trade shows, outdoor festivals, or any situation where flexibility is key. Most portable systems come with adjustable heights (up to 18 feet) and various base options for stability, allowing you to adapt to different venues and conditions.
Stationary flag installations are better suited for permanent or long-term displays. These setups use in-ground poles that can handle larger flags and withstand stronger winds, offering maximum stability. While less flexible than portable options, they’re ideal for locations where the flag will remain in place for extended periods.
For most events, portable flags strike the right balance of convenience and impact. You can adjust the height to suit your venue, reposition displays for better visibility, and pack everything up for your next event. For example, Peak Banner’s feather flags, starting at $49, combine custom printing with easy setup, making them a great choice for businesses attending multiple events or needing adaptable solutions.
Ultimately, the decision between portable and stationary systems depends on your event’s specific requirements. Whether you need flexibility or a more permanent setup, choosing the right system ensures your flag display is both practical and impactful.
Selecting the Best Banner Size for Maximum Impact
Now that we’ve covered flag sizes, let’s shift our attention to banners, where size and layout play a huge role in grabbing attention. When done right, banners can effectively communicate your message. With 91% of people favoring visual content over text, choosing the right banner dimensions can mean the difference between fading into the background and standing out.
Vertical vs. Horizontal Banner Layout
The orientation of your banner significantly affects how people engage with it. Vertical banners are great for areas with limited floor space but plenty of height. They naturally guide the viewer’s eye upward, making them perfect for showcasing a logo at the top, followed by supporting details. These banners are especially effective at trade shows and exhibitions. For example, Peak Banner’s pull-up banners are portable and easy to set up, making them ideal for indoor events. Their small footprint ensures they don’t clutter your booth while still delivering a strong visual impression.
On the other hand, horizontal banners work well for messages that require more space, such as outdoor events, building facades, or backdrops. Since people typically read from left to right, horizontal layouts are great for presenting detailed information like contact details or event schedules.
"If you’re working with limited floor space or need something portable and professional for indoor events, vertical banners are the way to go. On the other hand, if you want to catch attention from afar in outdoor settings or across large areas, a horizontal banner will likely serve you better."
– Luna Writes
In short, vertical banners are ideal for compact indoor spaces, while horizontal banners excel in outdoor or large-scale environments.
Text Size and Reading Distance Guidelines
When designing a banner, follow the 1-inch-per-10-feet rule for letter size. For instance, if your banner will be viewed from 50 feet away, the main text should be at least 5 inches tall.
Start by determining the viewing distance, then calculate the letter size accordingly. For example:
- A banner meant for 20 feet requires 2-inch tall letters.
- A banner viewed from 100 feet needs letters around 10 inches tall.
Font choice also matters. Sans-serif fonts like Arial or Helvetica are easier to read from a distance compared to serif fonts. Thicker fonts add contrast, improving legibility. Additionally, ensure high color contrast between the text and background to keep your message clear from all angles.
By following these guidelines, you’ll ensure your banners align with your event’s branding while staying easy to read.
Common Banner Sizes and Where to Use Them
Familiarity with standard banner sizes can help you select the right display for your event. Here’s a quick breakdown:
- Small vinyl banners (18×36 inches to 24×48 inches): Perfect for check-in signs, table displays, or fence signage viewed from up to 10 feet.
- Medium vinyl banners (24×72 inches to 48×96 inches): A versatile choice for trade shows, gym walls, or outdoor festivals, visible from 10 to 35 feet.
- Large vinyl banners (60×96 inches and larger): Ideal for stadiums, building wraps, or major outdoor advertising, visible from 30 to 100 feet.
| Banner Size | Best Applications | Viewing Distance |
|---|---|---|
| 24×36 inches | Table displays, indoor signage | Up to 10 ft |
| 48×96 inches | Trade shows, outdoor events | 10–35 ft |
| 72×96 inches | Large venues, outdoor ads | 30–100 ft |
Retractable banners, often sized at 33×81 inches, are another great option. They’re portable and easy to set up, making them perfect for professional events. Step-and-repeat banners (typically 8×8 feet) are another popular choice, especially for photo backdrops at media events and trade shows.
When deciding between standard and custom sizes, think about your venue, budget, and the message you want to convey. Standard sizes are cost-effective and convenient, while custom dimensions let you tailor the banner to fit unique spaces or designs. Whatever you choose, ensure it fits the setting and communicates your message effectively.
sbb-itb-c623e60
Determining the Right Tent Size for Your Event
Choosing the right tent size is essential for ensuring guest comfort and the overall success of your event. To make the best choice, you’ll need to consider your guest count, the event format, and any limitations of your venue.
Space Requirements Per Person
How much space each guest needs depends on the type of event you’re hosting. For example:
- Standing cocktail parties: These require the least amount of space, about 6–8 square feet per person, making them ideal for casual gatherings or networking events.
- Seated dinners: Plan for 15–20 square feet per person to comfortably fit tables, chairs, and allow for easy movement.
- Ceremony seating: Whether for weddings or presentations, allocate 8–10 square feet per person.
- Dining with entertainment: If your event includes a seated dinner along with a dance floor or live music, aim for 18–22 square feet per person.
- Classroom or theater seating: These setups typically need 10–12 square feet per person.
- Lounge or mixed seating: For a relaxed vibe, 15–20 square feet per person works well.
Don’t forget to factor in extra space for features like catering stations, dance floors, or stages. If you’re unsure about the exact requirements, it’s always safer to go with a slightly larger tent.
Popular Tent Sizes and Their Uses
Familiarizing yourself with common tent sizes can help you match the right option to your event. Below is a guide to popular tent dimensions and their typical capacities:
| Tent Size | Square Feet | Theater Seating | Cocktail Style | Sit-Down Dinner |
|---|---|---|---|---|
| 10×10 | 100 | 14 | 13 | 8 |
| 20×20 | 400 | 57 | 50 | 33 |
| 20×40 | 800 | 114 | 100 | 67 |
| 30×30 | 900 | 129 | 113 | 75 |
| 40×60 | 2,400 | 343 | 300 | 200 |
| 40×100 | 4,000 | 571 | 500 | 333 |
When designing your layout, consider any special elements like head tables or reception areas that may require additional room. These guidelines can help you create a setup that feels both comfortable and functional.
Height and Clearance Requirements
While square footage is important, don’t overlook vertical space. Tent heights usually range from 8 to 12 feet at the peak, but your specific needs might call for adjustments. For example:
- Taller tents improve air circulation – especially useful for summer events.
- If you plan to use heaters, sidewalls, or decorative elements like hanging lights, ensure the tent has enough clearance.
Additionally, venue restrictions can influence your tent choice. Factors like uneven terrain, trees, underground pipes, or slopes may limit your options. Before finalizing your selection, measure the site, check for irregularities, and confirm compliance with local codes. Be sure to evaluate the site’s drainage and load-bearing capacity to accommodate equipment.
Peak Banner offers custom logo canopy tents starting at $185, with sizes ranging from compact 10×10-foot setups for intimate events to larger configurations for corporate gatherings. Selecting the right tent not only ensures adequate space for your guests but also provides a great opportunity to showcase your branding effectively.
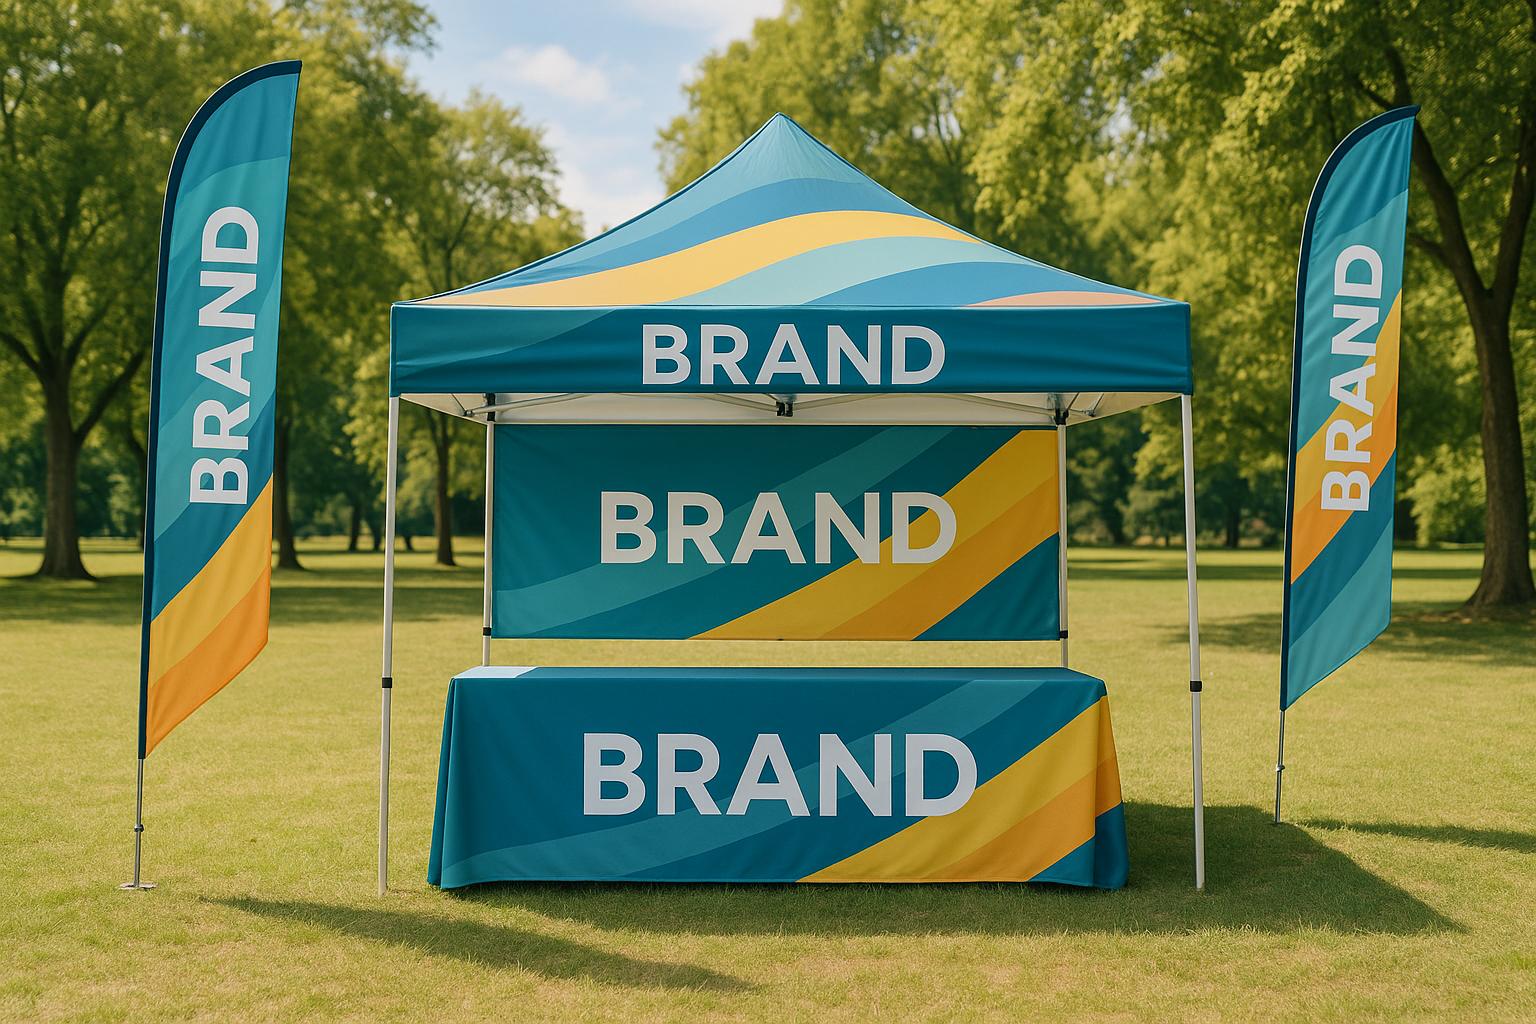
Combining Displays for Unified Branding
Bringing together your tent, flags, and banners into a coordinated setup creates a striking, cohesive brand presence that naturally draws attendees to your space. Once you’ve got your displays ready, the next step is to strategically position your flags and banners around the tent to maximize visibility and impact.
Flag and Banner Placement Around Tents
Think of your tent as the central hub – your "main stage." Flags and banners serve as supporting players, enhancing the overall visual appeal and guiding visitors to your space. Place flags at entrances to mark pathways and attract attention, while banners work well alongside or even inside the tent to emphasize key messages or promotions.
Flags are perfect for catching the eye from a distance, making them ideal for marking entrances and directing foot traffic. Meanwhile, banners excel at reinforcing your brand’s messaging. Use them to highlight special offers or services, whether they’re displayed on the tent’s exterior or within its interior.
"The goal isn’t to impress with volume – it’s to be seen clearly and remembered easily." – Georgea, EXHIB-IT!
To elevate your branding further, print your logo across the tent canopy and consider adding custom sidewalls. This creates a polished, enclosed space that serves as your branded headquarters.
Size Ratios for Display Elements
Getting the proportions right is key to creating a balanced and professional setup. The size of your tent should guide the scale of your flags and banners. For smaller tents, opt for more modestly sized displays to maintain harmony. Larger tents, on the other hand, can handle more prominent supporting elements without looking crowded. Consistent use of colors across all displays strengthens brand recognition and ties everything together visually.
Adjustments for Weather and Venue Limits
Outdoor events come with their own challenges, so it’s essential to adapt your displays to weather conditions and venue restrictions. Use weather-resistant materials like polyester or nylon for flags and banners. Polyester is sturdy and great for bold prints, while nylon’s lightweight design allows it to flutter even in light breezes.
Secure your displays with heavy-duty weights, sandbags, stakes, or straps, depending on the venue’s surface. Position them in sheltered spots, like near buildings or trees, to reduce wind exposure. Always check local regulations for placement and use reliable mounting methods. For extreme weather, have backup options ready, and ensure your designs feature bold colors and clear fonts to stay visible in less-than-ideal conditions.
Complete your branded environment by pairing a custom logo canopy tent with feather flags and table covers. This combination creates a professional, cohesive look that adapts to various weather conditions and venue requirements while leaving a lasting impression.
Key Takeaways for Choosing the Perfect Sizes
Creating effective event displays is all about finding the right balance between practicality and visual appeal. The key is to align your display sizes with your audience, venue, and event goals. When done right, your setup will not only grab attention but also create an inviting atmosphere that supports your message.
Start by considering the viewing distance and space limitations of your venue. Choose banner sizes that are easy to read from the expected distance and ensure they fit within the venue’s dimensions. For tents, aim for approximately 10 square feet per person for theater-style seating or up to 20 square feet per person for classroom-style arrangements. Don’t forget to check for any height restrictions the venue may have . Once your display sizes are sorted, shift your focus to consistent, clear branding.
Keep your branding uniform by using the same logos, colors, and fonts across all elements. Place critical information at eye level, and opt for high-contrast color combinations to ensure your message pops .
When planning your setup, avoid overcrowding. Stick to 2–3 display elements around your tent to keep the space clean and organized. If your event involves activities like product demonstrations, consider open-style tents to reduce clutter and create a more functional space.
Don’t overlook practical considerations like weather conditions. Use materials that can withstand the elements and leave enough space for smooth movement and accessible exits . These details ensure your setup remains functional and inviting, no matter the circumstances.
FAQs
How can I choose the right sizes and types of flags, banners, and tents to make my brand stand out at an event?
To make your brand shine, opt for flags, banners, and tents that align with your event’s scale, target audience, and objectives. Using bold, attention-grabbing colors and clear, concise messaging on your displays is key to standing out, especially in crowded settings. For tents, custom designs featuring your logo and branding can help create a polished and inviting atmosphere.
Placement and variety also play a big role. Set up banners in busy areas to catch as many eyes as possible, and mix it up with different flag styles, like feather or teardrop designs, to create engaging visuals from various perspectives. When these elements come together thoughtfully, your event setup will leave a lasting impression.
How do I decide between portable and stationary flags for my event?
When deciding between portable and stationary flags, it all comes down to what your event demands, where it’s happening, and the outcome you’re aiming for.
Portable flags are lightweight, easy to carry, and a breeze to set up. That makes them ideal for outdoor events, trade shows, or festivals where you need flexibility. They’re especially handy if you plan to adjust their placement throughout the event to catch more attention.
On the flip side, stationary flags are built for more permanent or long-term setups. Think entrance markers or pathway decorations. These flags are usually sturdier and crafted to handle various weather conditions, staying put and maintaining visibility in one spot.
To figure out the right choice, think about your event’s environment, how often you’ll need to move the flags, and whether durability or mobility matters more for your display.
How can I make sure my event displays are durable and ready for outdoor use?
When preparing event displays for outdoor conditions, it’s crucial to select materials that can stand up to the elements. Heavy-duty vinyl and mesh are great picks for banners and flags because they’re waterproof and built to endure windy conditions. To combat sun damage and fading, consider adding a UV-resistant coating – this can help your displays last much longer.
Material choice is only half the battle; proper setup is equally essential. Use reinforced frames to give your displays extra stability, and make sure every component is securely anchored to handle strong winds. For tents, heavy-duty stakes or weights are a must to keep them firmly in place. By pairing tough materials with a rock-solid setup, your event displays will be ready to perform, rain or shine.


